Forward email
If you want to forward an email, first open it to view it, then use the forward button (3).
Note: When you are in the text input area (8), the address fields are collapsed to enlarge the input area. is displayed in place of the address fields. You can tap it to display the address fields again at any time.
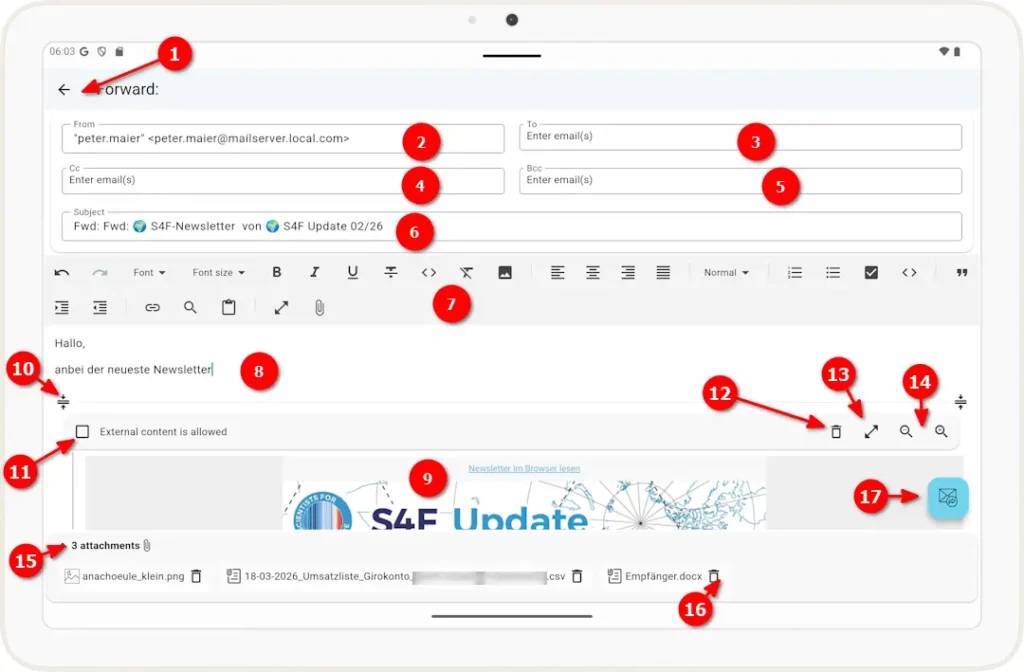
1 Click the left arrow to return to the email and close this view.
2 The sender of this email. The email address associated with the email account is suggested here.
Note: You can change the sender address, but the email will only be sent successfully if your email provider recognizes this address as a valid sender address.
3 Recipient address(es) for this email. In fields that allow multiple email addresses, the individual addresses are displayed as “dots.” You can remove an address by tapping the X next to it. You can edit an address by tapping the address text.
4 email addresses to which this email will be copied.
5 email addresses to which this email will be copied without those addresses being visible to the other recipients.
6. Field for the email subject line (already populated with the subject line of the original email)
7 Toolbar for formatting the email text, such as font, alignment, etc.
8 In this input field, you can enter additional content.
9 The content of the email to be forwarded.
10 Show or hide the toolbar in the original email.
11 Display external content in the forwarding email.
12. Delete the original email.
13 Expand the original email to full screen.
14 Increase or decrease the font size of the original email.
15 If the original email contains attachments, they will be displayed here; you can show or hide this section by clicking ∧.
16 You can remove attachments from the forwarded email by clicking this icon.
17. Button to forward the email to the sender.